
Button, adından da anlaşılacağı gibi, kullanıcının bir işlemi gerçekleştirmek için basabileceği veya tıklatabileceği bir bileşendir. Button‘a özgü birkaç özelliğe sahip bir TextView ile aynı özelliklere sahiptir.
Aşağıda, XML düzenini kullanarak android uygulamanızda bir buton görünümünü nasıl tanımlayacağınızı belirttik:
|
1 2 3 4 5 6 7 8 9 10 |
<Button android:id="@+id/btn_mesaj" android:layout_width="match_parent" android:layout_height="wrap_content" android:text="TIKLA" android:padding="20dp" android:textColor="@android:color/primary_text_dark" /> |
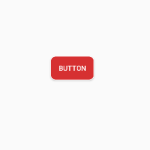
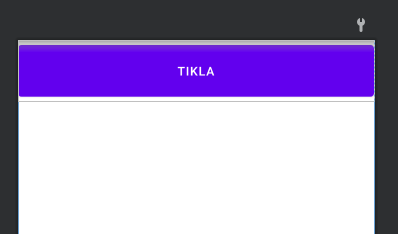
Çıktı:
Button görünümünün ana kullanımı, bir düğmeye her tıkladığımızda, o belirli düğme isteğini işleyecek ve gerekli eylemi gerçekleştirecek bir yöntem belirleyebilmemizdir. Bu, Activity sınıfı içinde aşağıdaki gibi yapılabilir:
Not: Activity sınıfı hakkında şu an için bilginiz yoksa endişelenmeyin. Çok yakında açıklayacağız.
.java
|
1 2 3 4 5 6 7 8 9 10 11 |
Button b = (Button) findViewById(R.id.btn_mesaj); // setting on click event listener b.setOnClickListener(new View.OnClickListener() { public void onClick(View v) { // Düğme(Buton) tıklandığında yapılacaklar } }); |
Burada, btn_mesaj id’sine sahip düğmeye her bastığımızda, içindeki kodu yürüten metodu yukarıda görmektesiniz.
View.OnClickListerner ilgili daha fazla bilgi için buraya tıklayın.
Butona Olay eklemek için android:onClick’i kullanma
Ayrıca, aşağıda belirtildiği gibi, android:onClick niteliğini kullanarak butona click olayını doğrudan XML’inde bir yöntem olarak atayabiliriz.
|
1 2 3 4 5 6 7 8 9 10 11 |
<Button android:id="@+id/btn_mesaj" android:layout_width="match_parent" android:layout_height="wrap_content" android:text="TIKLA" android:padding="20dp" android:textColor="@android:color/primary_text_dark" android:onClick="uyariVer" /> |
Java:
|
1 2 3 4 5 6 7 8 9 10 11 12 13 14 15 16 17 18 19 20 21 22 23 |
import androidx.appcompat.app.AppCompatActivity; import android.os.Bundle; import android.view.View; import android.widget.Button; import android.widget.TextView; public class MainActivity extends AppCompatActivity { public void uyariVer(View v){ //butona tıklayınca buradaki kodlar çalışacak(btn_mesaj) onclick değerine atama yapıldı. } @Override protected void onCreate(Bundle savedInstanceState) { super.onCreate(savedInstanceState); setContentView(R.layout.activity_main); } } |
Kotlin:
|
1 2 3 4 5 6 7 8 9 10 11 12 13 14 15 16 17 |
import android.os.Bundle import android.view.View import androidx.appcompat.app.AppCompatActivity class MainActivity : AppCompatActivity() { fun uyariVer(v: View?) { //butona tıklayınca buradaki kodlar çalışacak(btn_mesaj) onclick değerine atama yapıldı. } override fun onCreate(savedInstanceState: Bundle?) { super.onCreate(savedInstanceState) setContentView(R.layout.activity_main) } } |
Benzer şekilde, android:onClick niteliği, TextView, EditText, RadioButton, CheckBox vb. gibi mevcut tüm View alt sınıflarıyla kullanılabilir.

Button’lar için yaygın olarak kullanılan özellikler
- Button Viewleri şekillendirmek için yaygın olarak kullanılan bazı öznitelikler aşağıda verilmiştir.
- android:gravity: Bu, uygulama ekranındaki herhangi bir Görünümün konumunu ayarlamak için kullanılabilir. Kullanılabilir değerler right, left, center, center_verticall vb.’dir. Ayrıca,
|sembol ile değerleri birleştirebilirsiniz..
android:textSize: Butonun içindeki metin boyutunu ayarlamak için. - android:background: Butonunarka plan rengini ayarlamak için.
- android:TextColor:Butonun içindeki yazının rengini ayarlamak için.
- Butonuna, metnin yanına sırasıyla
android:drawableRight,android:drawableLeft,android:drawableTopveandroid:drawableBottomkullanılarak resim eklenebilir.
Android Button Örnekleri
Aşağıdaki örneklerde eklediğiniz butonlar ile ilgili bir dizi işlem yapılmıştır. Bazı örneklerde TextView ve EditView de kullanılmıştır.
Örnek 1: İlk örneğimiz ekrana basit bir tane buton nesnesi ekleyip Toast mesajı verdirmek olacak. Aşağıdaki XML ve JAVA/Kotlin kodlarını inceleyin.
XML
|
1 2 3 4 5 6 7 8 9 10 11 12 13 14 15 16 17 18 19 20 21 22 |
<?xml version="1.0" encoding="utf-8"?> <LinearLayout xmlns:android="http://schemas.android.com/apk/res/android" xmlns:app="http://schemas.android.com/apk/res-auto" xmlns:tools="http://schemas.android.com/tools" android:layout_width="match_parent" android:layout_height="match_parent" android:background="#FFFFFF" android:orientation="vertical" tools:context=".MainActivity"> <Button android:id="@+id/btn_mesaj" android:layout_width="match_parent" android:layout_height="wrap_content" android:text="TIKLA" android:padding="20dp" android:onClick="uyariVer" /> </LinearLayout> |
JAVA(seçenek 1)
|
1 2 3 4 5 6 7 8 9 10 11 12 13 14 15 16 17 18 19 20 21 22 23 24 |
import androidx.appcompat.app.AppCompatActivity; import android.os.Bundle; import android.view.View; import android.widget.Button; import android.widget.TextView; import android.widget.Toast; public class MainActivity extends AppCompatActivity { public void uyariVer(View v){ Toast.makeText(getApplicationContext(),"Tasarım Kodlama", Toast.LENGTH_LONG).show(); } @Override protected void onCreate(Bundle savedInstanceState) { super.onCreate(savedInstanceState); setContentView(R.layout.activity_main); } } |
Kotlin(Seçenek 1)
|
1 2 3 4 5 6 7 8 9 10 11 12 13 14 15 16 17 18 19 |
import android.os.Bundle import android.view.View import android.widget.Toast import androidx.appcompat.app.AppCompatActivity class MainActivity : AppCompatActivity() { override fun onCreate(savedInstanceState: Bundle?) { super.onCreate(savedInstanceState) setContentView(R.layout.activity_main) } fun uyariVer(v: View?) { Toast.makeText(applicationContext, "Tasarım Kodlama", Toast.LENGTH_LONG).show() } } |
Örnek 2: İlk örneğimiz ekrana basit bir tane buton nesnesi ekleyip toast mesajı verdirmek olacak(Yukarıdaki örneği View.OnClickListener kullanarak yapacağız).
XML
|
1 2 3 4 5 6 7 8 9 10 11 12 13 14 15 16 17 18 19 20 21 |
<?xml version="1.0" encoding="utf-8"?> <LinearLayout xmlns:android="http://schemas.android.com/apk/res/android" xmlns:app="http://schemas.android.com/apk/res-auto" xmlns:tools="http://schemas.android.com/tools" android:layout_width="match_parent" android:layout_height="match_parent" android:background="#FFFFFF" android:orientation="vertical" tools:context=".MainActivity"> <Button android:id="@+id/btn_mesaj" android:layout_width="match_parent" android:layout_height="wrap_content" android:text="TIKLA" android:padding="20dp" /> </LinearLayout> |
Java
|
1 2 3 4 5 6 7 8 9 10 11 12 13 14 15 16 17 18 19 20 21 22 23 24 25 26 |
import androidx.appcompat.app.AppCompatActivity; import android.os.Bundle; import android.view.View; import android.widget.Button; import android.widget.Toast; public class MainActivity extends AppCompatActivity { @Override protected void onCreate(Bundle savedInstanceState) { super.onCreate(savedInstanceState); setContentView(R.layout.activity_main); Button b = (Button) findViewById(R.id.btn_mesaj); // setting on click event listener b.setOnClickListener(new View.OnClickListener() { public void onClick(View v) { Toast.makeText(getApplicationContext(),"Tasarım Kodlama", Toast.LENGTH_LONG).show(); } }); } } |
Kotlin
|
1 2 3 4 5 6 7 8 9 10 11 12 13 14 15 16 17 18 19 20 |
import android.os.Bundle import android.view.View import android.widget.Button import android.widget.Toast import androidx.appcompat.app.AppCompatActivity class MainActivity : AppCompatActivity() { override fun onCreate(savedInstanceState: Bundle?) { super.onCreate(savedInstanceState) setContentView(R.layout.activity_main) val b = findViewById<View>(R.id.btn_mesaj) as Button // setting on click event listener b.setOnClickListener { Toast.makeText(applicationContext, "Tasarım Kodlama", Toast.LENGTH_LONG).show() } } } |
Örnek 3: Buton click olayı ile ekrandaki EditText içindeki veriyi mesaj verdirmek.
XML
|
1 2 3 4 5 6 7 8 9 10 11 12 13 14 15 16 17 18 19 20 21 22 23 24 25 26 27 |
<?xml version="1.0" encoding="utf-8"?> <LinearLayout xmlns:android="http://schemas.android.com/apk/res/android" xmlns:app="http://schemas.android.com/apk/res-auto" xmlns:tools="http://schemas.android.com/tools" android:layout_width="match_parent" android:layout_height="match_parent" android:background="#FFFFFF" android:orientation="vertical" tools:context=".MainActivity"> <EditText android:layout_width="match_parent" android:layout_height="wrap_content" android:id="@+id/ed_mesaj" android:layout_marginBottom="10dp" /> <Button android:id="@+id/btn_mesaj" android:layout_width="match_parent" android:layout_height="wrap_content" android:text="TIKLA" android:padding="20dp" /> </LinearLayout> |
Java
|
1 2 3 4 5 6 7 8 9 10 11 12 13 14 15 16 17 18 19 20 21 22 23 24 25 26 27 28 29 30 31 32 |
import androidx.appcompat.app.AppCompatActivity; import android.os.Bundle; import android.view.View; import android.widget.Button; import android.widget.EditText; import android.widget.TextView; import android.widget.Toast; public class MainActivity extends AppCompatActivity { @Override protected void onCreate(Bundle savedInstanceState) { super.onCreate(savedInstanceState); setContentView(R.layout.activity_main); Button b = (Button) findViewById(R.id.btn_mesaj); EditText ed = (EditText)findViewById(R.id.ed_mesaj); // setting on click event listener b.setOnClickListener(new View.OnClickListener() { public void onClick(View v) { String mesaj = ed.getText().toString(); Toast.makeText(getApplicationContext(),mesaj, Toast.LENGTH_LONG).show(); } }); } } |
Kotlin:
|
1 2 3 4 5 6 7 8 9 10 11 12 13 14 15 16 17 18 19 20 21 22 23 24 25 26 |
import android.os.Bundle import android.view.View import android.widget.Button import android.widget.EditText import android.widget.Toast import androidx.appcompat.app.AppCompatActivity class MainActivity : AppCompatActivity() { override fun onCreate(savedInstanceState: Bundle?) { super.onCreate(savedInstanceState) setContentView(R.layout.activity_main) val b = findViewById<View>(R.id.btn_mesaj) as Button val ed = findViewById<View>(R.id.ed_mesaj) as EditText // setting on click event listener b.setOnClickListener { val mesaj = ed.text.toString() Toast.makeText(applicationContext, mesaj, Toast.LENGTH_LONG).show() } } } |
Çıktı:

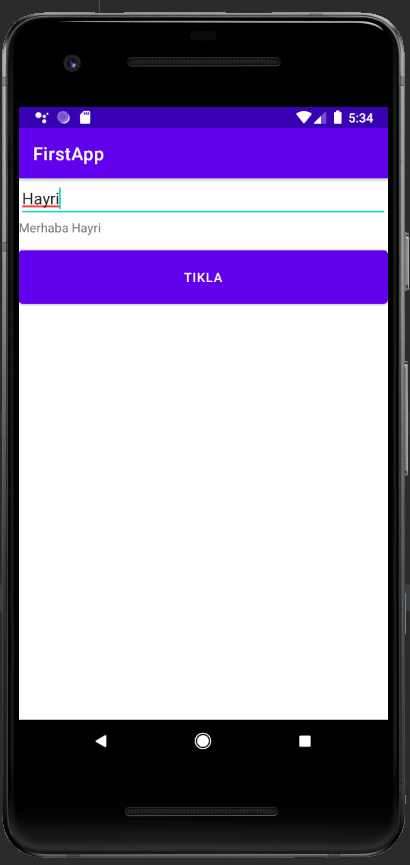
Örnek 4: Android Button’a tıklayarak EditText içindeki mesajı TextView içinde yazdıran örnek uygulama
XML
|
1 2 3 4 5 6 7 8 9 10 11 12 13 14 15 16 17 18 19 20 21 22 23 24 25 26 27 28 29 30 31 32 |
<?xml version="1.0" encoding="utf-8"?> <LinearLayout xmlns:android="http://schemas.android.com/apk/res/android" xmlns:app="http://schemas.android.com/apk/res-auto" xmlns:tools="http://schemas.android.com/tools" android:layout_width="match_parent" android:layout_height="match_parent" android:background="#FFFFFF" android:orientation="vertical" tools:context=".MainActivity"> <EditText android:layout_width="match_parent" android:layout_height="wrap_content" android:id="@+id/ed_mesaj" /> <TextView android:id="@+id/tv_mesaj" android:layout_width="match_parent" android:layout_height="wrap_content" android:layout_marginBottom="10dp" /> <Button android:id="@+id/btn_mesaj" android:layout_width="match_parent" android:layout_height="wrap_content" android:text="TIKLA" android:padding="20dp" /> </LinearLayout> |
JAVA
|
1 2 3 4 5 6 7 8 9 10 11 12 13 14 15 16 17 18 19 20 21 22 23 24 25 26 27 28 29 30 31 |
import androidx.appcompat.app.AppCompatActivity; import android.os.Bundle; import android.view.View; import android.widget.Button; import android.widget.EditText; import android.widget.TextView; import android.widget.Toast; public class MainActivity extends AppCompatActivity { @Override protected void onCreate(Bundle savedInstanceState) { super.onCreate(savedInstanceState); setContentView(R.layout.activity_main); Button b = (Button) findViewById(R.id.btn_mesaj); EditText ed = (EditText)findViewById(R.id.ed_mesaj); TextView tv = (TextView)findViewById(R.id.tv_mesaj); // setting on click event listener b.setOnClickListener(new View.OnClickListener() { public void onClick(View v) { tv.setText("Merhaba "+ed.getText()); } }); } } |
Kotlin:
|
1 2 3 4 5 6 7 8 9 10 11 12 13 14 15 16 17 18 19 20 21 22 23 |
package com.example.ktornek import android.os.Bundle import android.view.View import android.widget.Button import android.widget.EditText import android.widget.TextView import androidx.appcompat.app.AppCompatActivity class MainActivity : AppCompatActivity() { override fun onCreate(savedInstanceState: Bundle?) { super.onCreate(savedInstanceState) setContentView(R.layout.activity_main) val b = findViewById<View>(R.id.btn_mesaj) as Button val ed = findViewById<View>(R.id.ed_mesaj) as EditText val tv = findViewById<View>(R.id.tv_mesaj) as TextView // setting on click event listener b.setOnClickListener { tv.text = "Merhaba " + ed.text } } } |
Çıktı:
Örnek 5: Butona tıkladıkta TextView içindeki sayıyı bir arttırma
XML
|
1 2 3 4 5 6 7 8 9 10 11 12 13 14 15 16 17 18 19 20 21 22 23 24 25 26 27 28 29 30 |
<?xml version="1.0" encoding="utf-8"?> <LinearLayout xmlns:android="http://schemas.android.com/apk/res/android" xmlns:app="http://schemas.android.com/apk/res-auto" xmlns:tools="http://schemas.android.com/tools" android:layout_width="match_parent" android:layout_height="match_parent" android:background="#FFFFFF" android:orientation="vertical" tools:context=".MainActivity"> <TextView android:id="@+id/tv_mesaj" android:layout_width="match_parent" android:layout_height="wrap_content" android:layout_marginBottom="10dp" android:text="0" android:textSize="20sp" /> <Button android:id="@+id/btn_mesaj" android:layout_width="match_parent" android:layout_height="wrap_content" android:text="TIKLA" android:padding="20dp" /> </LinearLayout> |
Java
|
1 2 3 4 5 6 7 8 9 10 11 12 13 14 15 16 17 18 19 20 21 22 23 24 25 26 27 28 29 30 |
import androidx.appcompat.app.AppCompatActivity; import android.os.Bundle; import android.view.View; import android.widget.Button; import android.widget.EditText; import android.widget.TextView; import android.widget.Toast; public class MainActivity extends AppCompatActivity { @Override protected void onCreate(Bundle savedInstanceState) { super.onCreate(savedInstanceState); setContentView(R.layout.activity_main); Button b = (Button) findViewById(R.id.btn_mesaj); TextView tv = (TextView)findViewById(R.id.tv_mesaj); // setting on click event listener b.setOnClickListener(new View.OnClickListener() { public void onClick(View v) { int sayi = Integer.valueOf(tv.getText().toString()); tv.setText(String.valueOf(++sayi)); } }); } } |
Kotlin:
|
1 2 3 4 5 6 7 8 9 10 11 12 13 14 15 16 17 18 19 20 21 22 23 |
import android.os.Bundle import android.view.View import android.widget.Button import android.widget.TextView import androidx.appcompat.app.AppCompatActivity class MainActivity : AppCompatActivity() { override fun onCreate(savedInstanceState: Bundle?) { super.onCreate(savedInstanceState) setContentView(R.layout.activity_main) val b = findViewById<View>(R.id.btn_mesaj) as Button val tv = findViewById<View>(R.id.tv_mesaj) as TextView // setting on click event listener b.setOnClickListener { var sayi:Int =Integer.parseInt(tv.text.toString()) tv.text = (++sayi).toString() } } } |
Çıktı:

Daha fazla Android içeriği için Android Dersleri yazısını inceleyebilirsiniz.


4 Yorum